Provide an API
Introduction
To provide an API to the NLX network, you need to route traffic through the inway. To make sure traffic is encrypted between your and other nodes, we will use the certificate which we've setup in Retrieve a demo certificate .
Please note that:
- You need a domain name to provide an inway (an IP address will not work).
- The domain should be the same as the domain you used to generate the certificates (that was in Retrieve a demo certificate).
It is not recommended to follow this guide when you're working from your home network.
In the Docker Compose file we have started, the inway is running on the ports
8443and8444. Make sure that both ports are publicly available. For more information click here

Verification
Assuming you followed Getting up and running, the inway and Management API should already be up and running.
You can confirm that by inspecting the Management API logs:
docker logs nlx-try-me-management-api
The output should look similar to:
{"level":"INFO","time":"2021-01-06T14:06:01.051Z","caller":"nlx-management-api/main.go:61","message":"version info","version":"v0.92.0","source-hash":"5d5a8afecb1e504d6ea5c865d839720d47fedb24"}
Next, let's take a look at the logs of our inway:
docker logs nlx-try-me-inway
The output should look similar to:
{"level":"INFO","time":"2021-01-06T14:12:23.905Z","caller":"nlx-inway/main.go:156","message":"version info","version":"v0.92.0","source-hash":"5d5a8afecb1e504d6ea5c865d839720d47fedb24"}
Create a service
In the following example we will use Swagger Petstore as an example API.
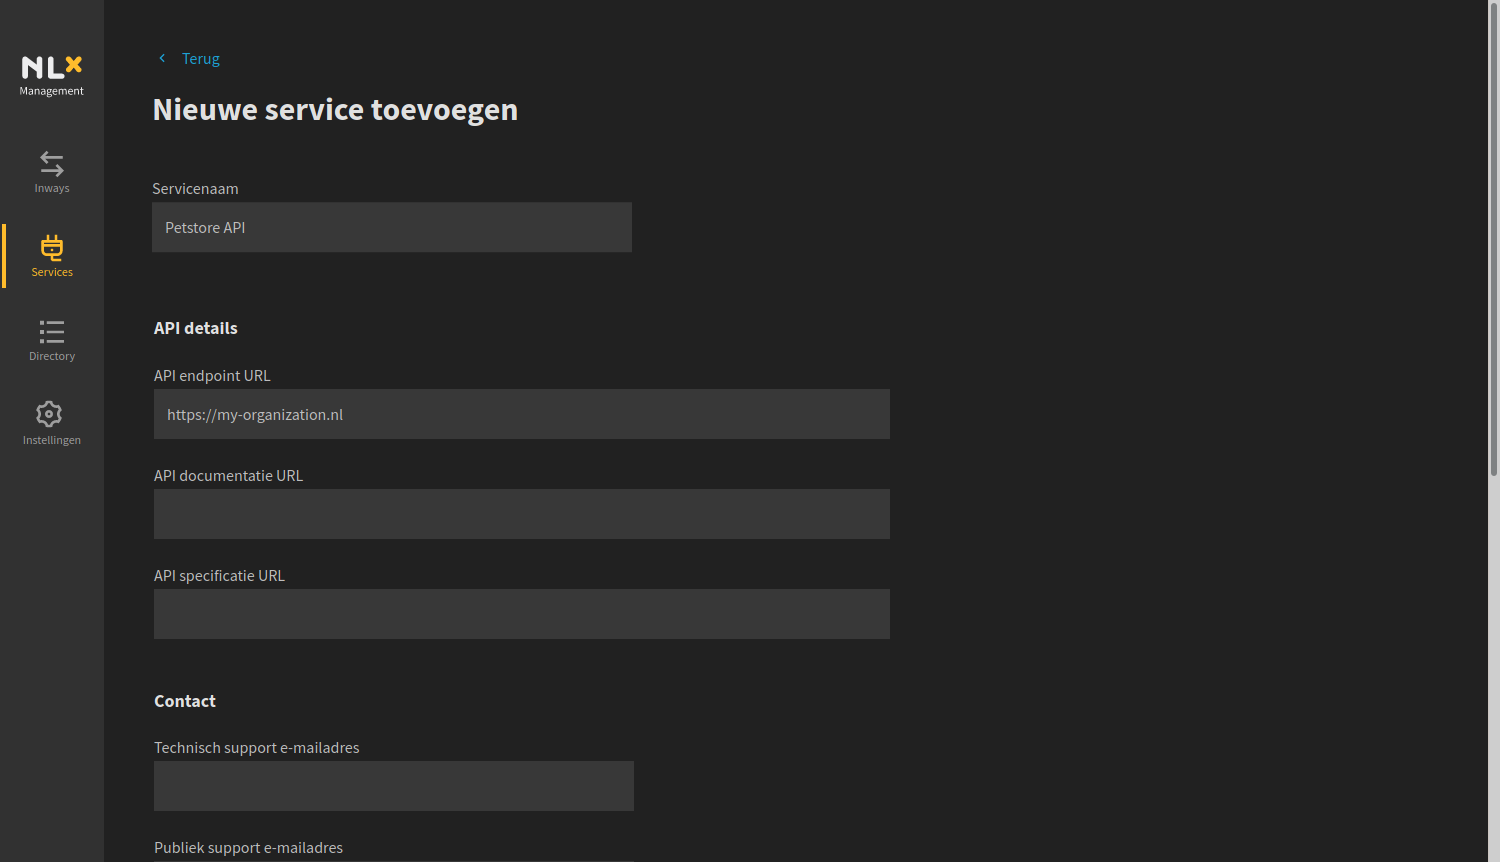
To provide our API in the NLX network we have to create a service in the Management UI. You can do that by going to the services page where you click on the 'Add service' button.
For the service name, use SwaggerPetStore and for the API endpoint URL use https://petstore.swagger.io/v2.
Select Inway-01 as the inway to be used by this service. The remaining fields can
be left blank.

Whenever you're ready, click 'Service toevoegen' to save the details and register the service in the demo directory.
If you're specifying you own API, please note that
localhostwill not work. If your API is running on the same machine as your inway, the endpoint URL should be your network IP and notlocalhost.
After adding the service, you should see the service in the services page and in the directory.
The directory will remove stale services automatically. A service will be marked stale when it is not announced for more than 24 hours.
Querying your own APIs
Now let's try to fetch some data from our inway using our outway using curl:
curl http://localhost:8081/{{ my-certificate-subject-serial-number }}/SwaggerPetStore/v2/pet/20002085
The response of the curl command should look similar to the following output (where ORGANIZATION_NAME/PUBLIC_KEY_FINGERPRINT are derived from the certificate generated in step 3).
nlx-inway: permission denied, organization "ORGANIZATION_NAME" or public key "PUBLIC_KEY_FINGERPRINT" is not allowed access.
We are denied access because we first need to request access. This is one of the key features of NLX Management!
In order to request access, follow these steps:
- Navigate to the 'Directory' in NLX Management.
- Select the service
SwaggerPetstorefrom the list - Expand the 'Outways zonder toegang' section by clicking on its title
- Click on 'Toegang aanvragen' for the Outway 'Outway-01'
- Now navigate to back the 'Services' page and again select the service
SwaggerPetStore. - You should see one access request under the section 'Toegangsverzoeken'.
- Expand the section and click on 'Accepteren' to accept the access request.
- You now have an access grant for the service.
Let's try to fetch the data again.
curl http://localhost:8081/my-organization/SwaggerPetStore/v2/pet/20002085
The response of the curl command should look similar to the following output.
{
  "args": {},
  "headers": {
    "x-forwarded-proto": "https",
    "host": "petstore.swagger.io",
    "accept": "*/*",
    "accept-encoding": "gzip",
    "user-agent": "curl/7.54.0",
    "x-nlx-logrecord-id": "<arbitrary-logrecord-id>",
    "x-nlx-request-organization": "00000000000000000001",
    "x-forwarded-port": "443"
  },
  "url": "https://petstore.swagger.io/v2/pet/20002085"
}
Congratulations, you have successfully provided an API on the NLX network! 🎉
Transaction log
The inway and the Outway are able to log metadata of the requests they process in the transaction log. The transaction log is a optional feature that is enabled in this guide. You can view the transaction log in NLX Management. Open a browser, navigate to http://localhost:8080 and log in. Now click on the Transactie logs button in the menu. You should now see several entries for the request you just made.
In sum
You have provided your API to the NLX network. In this part, you have:
- Created a service for the demo API
- Used your Outway to consume your own Inway API.
- Viewed the transaction logs in NLX Management